This is a very detailed and step by step tutorial for creating an Vector based design composition in Photoshop, with great aesthetics and almost flawless cohesion of elements.

In this tutorial we’ll be walking through the process of creating a Girl with a Raven Composition using some awesome techniques, you’ll learn loads of great tricks in this tutorial. If you want to take your creative composition skills to the next level, this Photoshop tutorial is perfect for you. Let’s get started!
Tutorial Details
- Estimated Completion Time: 6 hours
- Difficulty: Advanced
- Program: Photoshop, Illustrator
What we'll need:
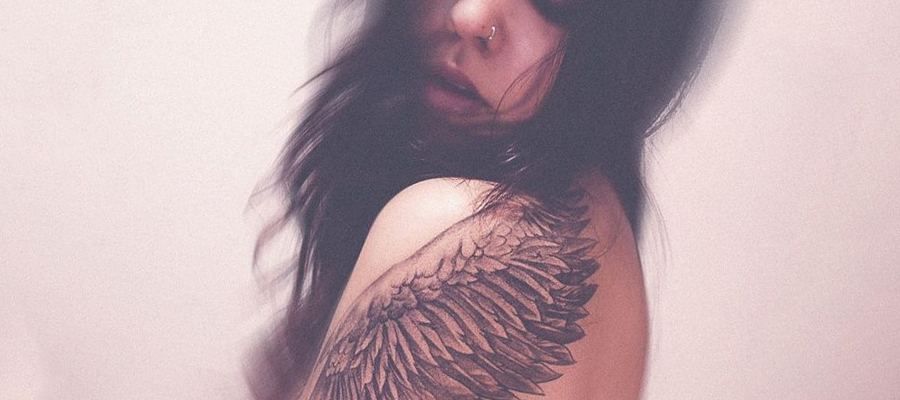
- Female Model
- Crow
- Silhouette of Crows
- Butterfly 1
- Butterflies
- Rose 1
- Rose 2
- Rose 3
- Leaves
- Poinsettia Leaf
- Paper Texture 1
- Paper Texture 2
- Dirt Texture
- Splatter and Drips Brushes
- Splatter Brushes
- Ink Scribbles Brushes
- Feather Brushes
- Watercolors Brushes
- Brush Strokes
Step 1
We need to make outlines from our main subjects, a girl and a crow. I'm using Illustrator here, you also can use the Pen Tool in Photoshop. Start with new blank document in Illustrator, A4 or higher. Place the girl image to the blank document.

Step 2
Go to menu Window > Transparency. Set the Opacity to 40% to make the image less visible.

Step 3
Then go to Menu > Brushes to open the Brushes window. Open brush library and select the Artistic Ink.

Step 4
We'll use the Tapered Stroke brush to make outlines later. You can use your own alternative sharp brushes collection if you want.

Step 5
Make a new layer, set Fill to None and Stroke to Black. Select Pen Tool and start to make line around her head. Don't forget to activate the Tapered Stroke with 0.25pt weight.

Step 6
We don't make a continuous path from the first point until the closing point. Just make the outline one by one for each path and let it open without closing it. This will make the curve have a sharp point in each start and end point.

Step 7
Let's continue to make outline around the girl until we got the basic shape of her head, a slight of her neck and shoulder.

Step 8
Make the outline of her eyes, nose and lips too. We need to fill her eyes and nose shape with solid black color. See the picture for this explanation.

Step 9
Then we need to make some details for her hair. Use Tapered Stroke with 0.15pt weight for thinner line.

Step 10
Create more lines for her hair details. Try to have more various curves to show the flow of her hair.

Step 11
Now, we'll make the outline for the crow like in our previous steps. Actually what we want to have is the basic shape of the crow, you can go more with line details if you want.

Step 12
Hide the source image layer and you can see your outlines right now. Don't worry about the size dimension of the girl and the crow. We can transform them when composing later. Try to group the girl and the crow individually and don't forget to save. Just let this document open and now we're moving to Photoshop.

Step 13
Open Photoshop and load the girl image. Isolate it using Channels Masking. Duplicate the one with highest contrast among all, we're duplicating the Blue channel here. Use Dodge and Burn to isolate the positive and negative area. After that, load the selection of Blue copy channel and inverse it and you'll get a selection of the girl without background. You also can use manual masking with Pen Tool or Hard Brush.

Step 14
Create a new blank document, A4 or higher. Working with a bigger dimension will help you to add more details. Fill the document background with soft cream color and place the selection of the girl into this new document. Try to erase some part of her body using masking. We'll focus working on her head and shoulder area.

Step 15
Then open and isolate the crow image using masking. Resize and place it behind the girl.

Step 16
Back to Illustrator, copy the girl outline first then paste it into Photoshop as a rasterized object, make sure the outlines fit the girl image. Do the same steps for the crow outline.

Step 17
We'll add more details on the girl's face. Pick Hard Round or Pencil tool with 2-3pt weight and let's start drawing some sketchy lines. The red circles are the example guides of the area that we want to draw. But you can explore more to give details in other area outside the red circles.

Step 18
From this step and next we'll be playing a lot with brushes, blending modes and textures. You can download them from any sites, such asDeviant Art or other sites.
Merge the girl outline with the girl image, and then change the blending mode into Darken or Darker Color with 90% opacity. Load some splatter and watercolor brushes, make a new masking and try to erase some parts using these brushes.

Step 19
We'll make the girl more like an illustration by rebrushing her face. Make a new layer, pick Soft Round brush with 20% opacity and 30% flow, use Eyedropper tool to select similar color from her skin then start to rebrushing it slowly around.

Step 20
Next, we'll make the image more like an illustration by adding more contrast and changing it into a soft and "pale" tone. Make New Curve Adjustment layer, in RGB channel make 2 points (see image below), the first point set below around Output: 44 - Input: 51 and the second one above around Output: 208 - Input: 185, then in Blue channel make 2 points again, first below Output: 67 - Input:72 and second above Output:218 - Input: 214. Don't forget to make a clipping mask of the Curve Adjustment layer. Next make a New Selective Color Adjustment, in Colors option choose Reds and reduce Black point to -20%, then choose Whites and add Yellow to +12%, Black -3%, then choose Neutrals, reduce the Yellow to -13%, Black -3% and last choose Blacks, reduce Yellow to -15%, add Black +10%. Make sure the Method: Absolute is selected. Make sure the Selective Color adjustment layer is in clipping mask above the Curve.
Those variables are just examples of my Curve and Selective Color adjustment tones, you can explore and try by your own adjustments. In the next steps, you can experiment the tone by yourself without any worry about the variables.

Step 21
We'll change the color of the girl’s hair to maroon, make New Solid Color adjustment, pick dark red color and change the blending mode to Multiply. You can see the arrangement of the adjustment layers in image below.

Step 22
Next we'll add blood around the girl face. Load and select the splatter brushes, make a new layer and add some splatters around her face and hair. Set the layer’s blending mode to Multiply. While using the brushes you can erase some parts that you don't like, just playing with them and be creative to achieve what you want.

Step 23
Choose the splatter brush with some long thin splashes to add more depth and bold blood effects in some parts.

Step 24
Now, we'll work with the crow image, repeat the same steps as you performed with the girl. Try to experiment with a combination of adjustment layers and variables, each images won't have same treatments to get same color tones.

Step 25
Add some sketchy and rough lines in some parts to give more illustrative effects.

Step 26
Select some watercolor and splatter brushes, erase some parts with masking.

Step 27
Next, we need some objects for decorations, we'll use rose to give "sweet and strong" feel. Isolate the rose image and flip it place behind the girl's head.

Step 28
Use the splatter brush to make it like a rusty rose, darken it a bit and add some more contrast.

Step 29
Duplicate the rose twice and transform each of them with different dimensions. Arrange them behind the girl.

Step 30
Then we'll add leaves as decoration, remove the white background, rotate it 180 degree and place below the girl's neck.

Step 31
Keep playing with the colors, layer adjustments and blending modes. Use some variations blending mode, such as Multiply, Darken, Soft Light and Overlay. You also can increase and the decrease the transparency of the objects by changing the Opacity value.

Step 32
Open a different leaf stock, duplicate it, change the color tones to blue and place them around the previous existing ones.

Step 33
Open the black rose image, duplicate and set it like what we did in our previous steps. But in this step, we'll use Exclusion as the blending mode to make them less visible.

Step 34
Next, also add some black roses, around the red rose; behind the crow and around the beak, you can play with transparency here. See the image below.

Step 35
We'll add more sharp objects, open the thorn image. Isolate and place it, you can erase the unused parts, we don't need to use all of the thorns. Duplicate with different dimension and direction. Place the thorns duplication near the roses and leaves.

Step 36
Add the complexity with more complex object. We'll use the silhouette of crows and branches image from Stockxchng.

Step 37
Then, we'll add different kind of roses, darker and sharper than the previous ones.

Step 38
Open the butterflies images, select some of them. Isolate and readjust contrast and color. Place and arrange them in the flying state as if they're flying away from the roses and the crow except the one below, we'll place a text later there.

Step 39
This step is the fun part of the tutorial, you can use traditional way to make sketch and doodle using pencil or pen and then scan them back to the computer and we'll process them digitally. This part is optional, if you don't like traditional way, you can just directly make some doodles in Photoshop.

Step 40
After scanning your doodle, process them digitally, add more black and white contrast level, then make a selection using Channels masking. You can use different blending mode and colors for your doodles.

Step 41
Use some bright and soft colors for your doodles and make some of them a little bit transparent.

Step 42
Load ink scribbles brushes, we'll use the brushes to add "scratch" effects to the image, combine these brushes with colors and blending mode. You also can make a temporary color palette in new blank canvas and use Eyedropper tool to pick them when you need it. This palette will really helps while working with similar color tones.

Step 43
Add more rough and grungy details, use some various splatter brushes with Overlay and Darken blending mode.

Step 44
Add more drips below the girl's neck, some big strokes and tea stains effect also can be added. Use some various shape of brushes to make the image has more texture.

Step 45
Next, we'll add more details, use Hard Round brush around 3pt weight and make some random lines across the image with different colors.

Step 46
We'll add bigger sharp lines, make new layer, set the Hard Brush around 15pt weight. Select Pen Tool and make a straight line across the girl and the rose. Right click and select Stroke Path, activate Simulate Pressure. You can make other lines with different brush size and colors.

Step 47
Now, let's playing with shape and outlines again, you can use Illustrator to make these shapes or straightly using Photoshop. Add them to the image with soft colors.

Step 48
Next, we'll make new triangle brush using Pen Tool. Firstly, make a new layer, choose Pen Tool, make random triangle paths then right click choose Make Selection... Fill the Feather Radius with 0 pixels. Then fill the selection with black color, after that go to Edit menu and select Define Brush Preset. Enter your brush name and now it will appear automatically in your current brush library.

Step 49
Select the triangles brush, then go to Window menu and choose Brushes. Activate Scattering mode and you can control some options there. Then make a new layer, and start to brushing around to make scattering effects.

Step 50
Next, we want to add some flying feathers, you can use feather stock images or brushes. Place some different feathers with various angle and size.

Step 51
We need to make movement and blurry effects to the feathers. Make a selection around the feathers, right click and choose Feather. Input the value around 20-30 pixels. Then go to Filter > Blur. You can use Gaussian blur to make an out of focus blur effect and Motion blur to make a blur with movement direction. If you want to make certain area blurry you can use Blur tool manually.

Step 52
Next, make a new layer behind all the objects, pick Soft Round brush with black color and set the blending mode to Multiply. Start to make some shadows behind.

Step 53
Add some soft transparent circles in the background.

Step 54
We'll add more dirty looks on the image. Add more transparent splatter above the objects.

Step 55
Now let's focus with the background, combine some dirt and grunge paper textures. Combine and play with the blending mode. Erase some unused area using masking.

Step 56
Add the butterflies tracks using Soft Round brush and Scattering effect.

Step 57
Select the butterfly tracks layer, right click and choose Blending Options. Activate the Outer Glow option and choose Hard Light as the blend mode. This will make shiny effects.

Step 58
We'll add more touch by giving more shadow and highlight area. Create new layer above all and activate option "Fill with Overlay-neutral color" with 50% opacity. Use white color to make highlight and use black to make shadow. This step is a Dodge and Burn method without damaging the image.

Step 59
Make new layer, use Soft Round brush and set the layer’s blending mode to Hard Light with 80% opacity. Choose soft and bright color, such as baby pink or soft violet for giving soft light effects.

Step 60
Above all of the layers make new color adjustment layers, such as Color Balance, Curve or Selective Color. Combine them and make the image a little bit reddish to make a "sweet" atmosphere.

Step 61
Okay, for final step we need to flatten the layers into a new layer on top. Use Command/Ctrl + Option + Shift +E then select the layer go to Filter >| Sharpen > Unsharp Mask. Fill Amount with 75%, Radius 1.0 and Threshold 0. You can increase and decrease the value depends on how much you want to make the image sharpen.

Final Image

Conclusion
This tutorial went over many techniques for creating a visually appealing composition. Don't forget to download the free full premium .psd file.
Remember, the only limit is your imagination, so don't hold back!