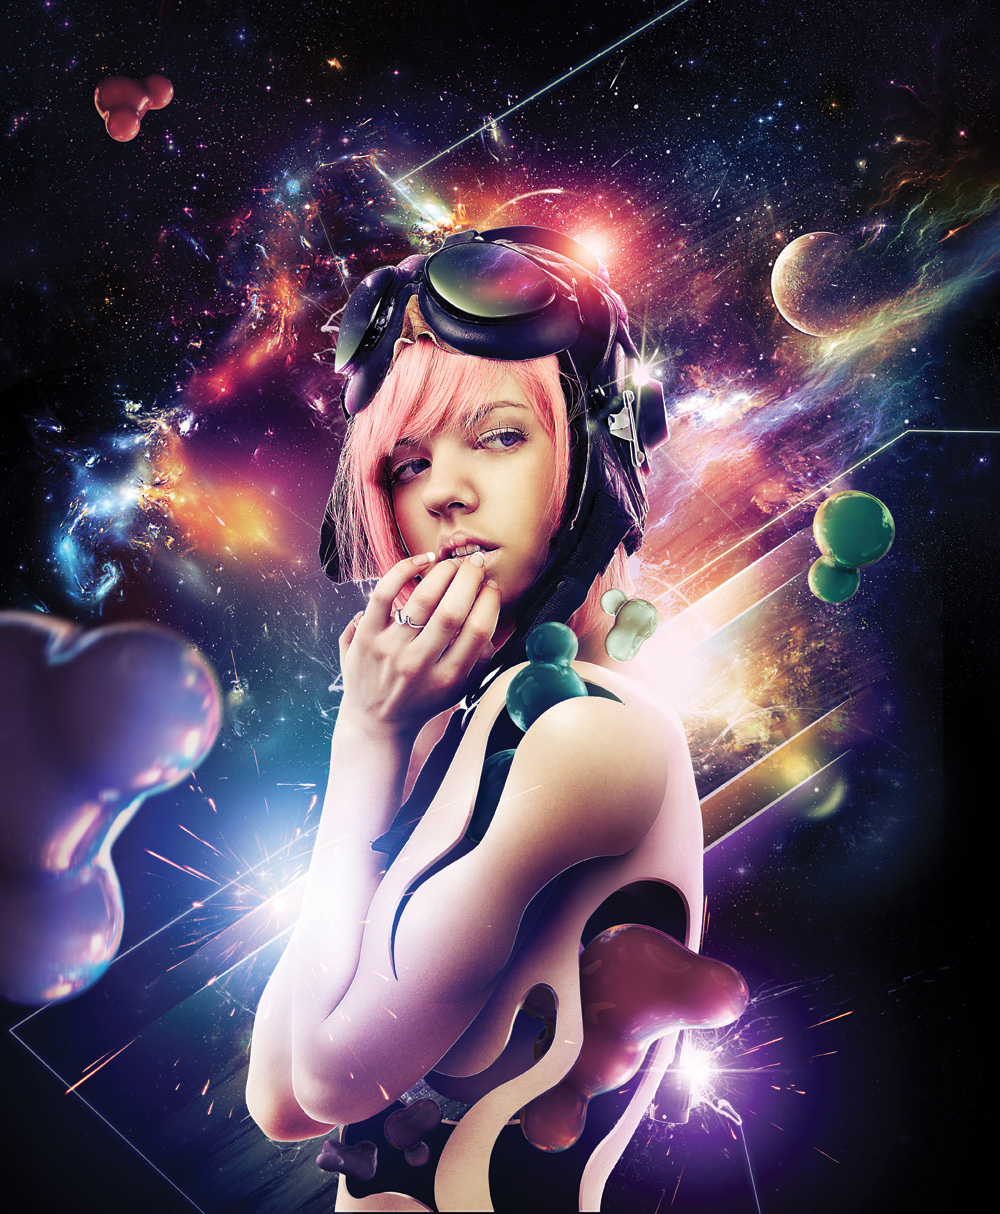
In this Photoshop photo manipulation tutorial, you will learn how to fuse a number of techniques to create this beautiful image of a girl in space, with a vintage feel to it.
You will be shown how to add several textures and effects, including lighting effects. Besides of the techniques you will learn how to combine colors to make the scene even more dramatic. Some steps can be a little tricky for beginners, but why not have a try? As usual, you’ll learn loads of great tips and cool tricks in this tutorial. If you want to take your creative composition skills to the next level, this Photoshop tutorial is perfect for you. Let’s get started!
Tutorial Details
- Program: Adobe Photoshop
- Difficulty: Advanced
- Estimated Completion Time: 5 Hours
Final Image: Space Girl Artwork
Step 1
Let start opening a new 300 DPI file on 4200px x 5100px. We will use beautiful Cosmo and Nebulas Pictures provide to us by
https://moonchilde-stock.deviantart.com/
.jpg)

Step 2
We will add more lightning and turn our galaxies into a dramatic mood. By using levels (Cmd/Ctrl + L) with this settings (9 – 1,00 – 255), and change the blending mode to screen.

Step 3
To blend our pictures edges with the background pick the 200px brush make a layer mask on the layer we are working on and open the brush engine. Set the scattering 121% and set the control off, count – 1, count jitter – 1%.


Step 4
Go to the layer mask and paint with black in 20% of brush opacity the edges of the bottom image to blend it with our black background.

Step 5
Add 2 more nebula pictures on the top of layers and repeat the 3 last steps.


Step 6
Now Select all (Cmd/Ctrl + A) and (Cmd/Ctrl+Shift + C) and Paste on the top of layers, set the blending mode to screen and make a layer mask and fill it with black.

Step 7
By using 100px round brush (this brush size can change depending on the area you are revealing) on 20% brush opacity star painting and revealing our highlights as you in the screenshot.

Step 8
Duplicate the layer and delete the layer mask and set the blending mode to normal. Go to filter – Other – High Pass with 6, 0 Radius. Set this layer to overlay.

Step 9
With the High Pass layer we want to make more brightness on our picture, so use the Dodge tool with the highlights setting in 12% and 182px brush size and start painting the highlights areas (this brush size can change depending on the area you are revealing).


Step 10
Go to Adjustment layers and add Hue Saturation bring the picture some new colors. You can achieve this by using the same techniques of brushes and layer masks. Use the colors you like most and play around with different adjustment layers.


Step 11
On this step you need to go to
https://www.istockphoto.com/stock-photo-3382925-aviator-helmet-girl
and buy the girl picture or use another picture if you want.

Step 12
Next go to Hue/Saturation (Cmd/Ctrl + U) and apply the screenshot settings. The use the Fade Control (Cmd/Ctrl + F) and apply the screenshot settings. Repeat this step and pick some color of the picture.


Step 13
Then go to Filter – Sharpen – Unsharp mask and use the screenshot settings.

Step 14
Duplicate the layer and apply the High Pass effect and use the same techniques of the step 8.


Step 15
In this steps we going to crop the lens glasses with the pen tool and fill them with the part of the background to create a reflection. Take care with the lightning in the scene and make the shine with the gradient tool.


Step 16
Add a new one Hue/Saturation adjustment layer and fill the mask with black and start revealing the new color on the areas you see in the screenshot to make a good integration with the background.

Step 17
Add some flares in areas of the girl with different brushes sizes.


Step 18
Now go to Image – Duplicate the File to start working just with the girl. Delete the nebulas background and merge all girl layers (Cmd/Ctrl+E) and let start to create some shapes to cut off the holes. Use the pen tool to do the shapes.

Step 19
Using the Pen Tool make a path, convert to selection, and fill it with black to make the black hole on the girl arm.


Step 20
Then use the same Selection to duplicate the Shape of the girl arm using (Cmd+Ctrl + J) put this layer on the top and go to Edit – Free Transform and move your anchor point to the left bottom and move your Arm Shape some grades to the right.

Step 21
Over again use the path and repeat the Selection step and Select go to Select – Modify – Contract and use the screenshot settings. Here we are going to create the Hole Edges.

Step 22
Use the Dodge tool and Burn tool to add the highlights and shadows on the hole edges and add more details painting the areas where you need more shadows or highlights.


Step 23
We need to add some shadows in the bottom of the arm shape to integrate it with the whole picture. Check out our screenshots


Step 24
Repeat the 19 to 22 steps to create more holes in the girl body.

Step 25
Add some more depth to the girl photo. Make 4 adjustment curves layers (2 for shades, 1 for highlights and 1 for eyes color) repeat the same techniques of layer mask and brush painting.


Step 26
Then add some flares using the brush tool with different sizes.

Step 27
We use some pictures from https://www.sxc.hu/browse.phtml?f=view&id=921435
to add some sparkles. Change the blending mode to screen and the selection and transform tools to make each spark larger.

Step 28
Next we add color lights with different brushes sizes and screen blending mode.

Step 29
In this step we going to add some dynamic lines and gradients. Pick the rectangular marquee tool and fill your selection with different color gradients, as you see on the screenshot.

Step 30
Let's add some 3d models, pay close attention to lightning on your scene and use the different mask, curves and brush techniques you learned, to integrate the 3d.


Step 31
To create more depth lets add a bigger 3d model in front of our artwork, and with lasso tool select the closer part of the render and go to Select – Feather – 30%, then go to Filter – Blur – Motion Blur – Angle 79 – Distance 10px. This will create a depth of field sense.

Step 32
Now we will turn the colors to a vintage look, adding curves as you see in the picture.


Step 33
Finally, we duplicate the artwork an go to Filter- Stylize-Glowing edges. And use the settings on the screenshot. The change the blending mode to soft light and the opacity to 45% and that’s all folks.


Final Image