Today we will create a fashion women scenery with Photoshop, a few stock photos and tons of fun. If you wanna create something interesting, you can have a try to create a composed scenery. Any objects can be composed and turned to be an artwork. Plus, there are quite a few tips and tricks you'll learn along the way in this tutorial, it's definitely worth reading.
TUTORIAL DETAILS
- Program: Adobe Photoshop
- Difficulty: Intermediate
- Estimated Completion Time: 2-4 Hours
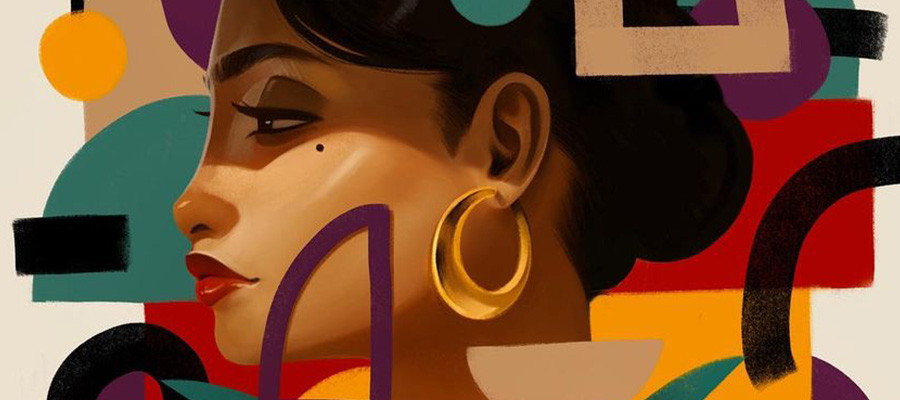
This is what we'll be creating:

TUTORIAL ASSETS
The following assets were used during the production of this tutorial.
- Brunette
- Splash 1
- Splash 2
- Splash 3
- Splash 4
- Splash 5
- Stylish Ring
- Diamond
- Rings
- Grunge Texture
- Dirty Wall
- Brushes
STEP 1
To start things off, set the canvas color to black using the paint bucket tool. Then, place a grunge texture, desaturate it, and set the blending mode to Hard Light with the transparency set to 30%.

STEP 2
Using the brushes you downloaded with the source files, with low opacity, erase some areas, as shown, to make the background more interesting. Make sure that you use a layer mask so that you can make changes, if needed.

STEP 3
Open the dirty wall texture and use channels to isolate some parts. Pick the channel with the most contrast and then use levels or curves to add even more. Once you are satisfied, press Command/Ctrl and click on the channel. Go back to layers, select inverse (Command/Ctrl + Shift + I) and then past it onto your canvas.


STEP 4
Once you’ve pasted your new texture, it should look something like this.

Use hue/saturation to match the color and lightness.

Use the Path Tool to erase some areas as shown.


Make it a bit darker using Curves (Command/Ctrl + M).

STEP 5
Now add a light source in the top right corner. I used a tablet and brushes to paint some areas with a warm color #b35225, set to linear dodge (add), flow: 30%.

Have fun with this and do your best to make the background more interesting. Use brushes to paint with low opacity. Paint some areas, and then delete. You’ll need to do some experimentation here. Make sure to do everything on separate layers so that you can change it later on, if needed.

Now take the lasso tool (L) and use the fast shaky hand technique to make a selection similar to the one below. Cut out that area and then change the blending mode to Overlay. Then paint some more.


Desaturate yours a bit if it is too strong like mine is.


STEP 6
Our background is starting to look better but we still need to add some finishing touches using some of the brushes from the brush set that you downloaded. Use a black brush to add some more details as shown.

STEP 7
Open the model photo and extract her from the background using the Path Tool. Place it in the lower left corner and flip her horizontally. Now bring in the ring photo as shown. Adjust the color of the model photo by creating a new layer, fill it with 50% black and set the blending mode to Overlay. Use dodge and burn to shade the hair and face.


STEP 8
Now let’s add some adjustment layers.


STEP 9
Using the path tool we will mark the areas on the models face which we want to cut out. Then, right-click and create a new layer by copying.
Duplicate each skin on a new layer. Duplicate them once again. We should have two layers. The bottom layer will serve as a shadow, name it the shadow layer, select it and using hue/saturation, decrease lightness to zero. Now click on the layer above, and go to the liquify filter (Command/Ctrl + Shift + X). Gently move the pieces of skin, to give the impression the skin is coming unstuck from her face.


STEP 10
Use the burn and dodge tools to make the skin pieces more realistic. Use the blur tool to make a more realistic shadow.


Go to the model layer, using the path tool, draw a random shape, cut out that shape and paste it as shown. Using this technique, we can cut out some elements of the face and use them as floating elements around the model’s face.


STEP 11
Extract the diamond photo and place it on the canvas.

Use a soft round brush set to a purple color, add a glow as shown. Set the blending mode to screen.

Duplicate the layer and transform it to create a more shiny effect.

Add another sparkle using a brush.


Use a tablet with a 1px brush to paint some lines from one object to another.

STEP 12
Open the splash images and extract them from their backgrounds using the magic want or path tool. Then bring them into your working document.


STEP 13
Use the liquify filter to manipulate the shapes of the splashes to your own preference.

STEP 14
Use adjustments to correct the colors of the stock images. You can do this using curves, saturation, and levels. I used curves to make it a bit darker and then hue/saturation to adjust the color.


STEP 15
Make more splashes using the liquify/color correction technique and place them as shown.


STEP 16
Continue placing splashes. Edit the shape of each one to make each different. Some should be bigger, some smaller, etc.. Don’t edit the blending mode because each shape will need to be layered on top of each other. Blending modes will make everything look a bit messy.


STEP 17
Now let’s add some warm light in the top right corner. On top of all our layers, create a new adjustment layer using hue/saturation. Hue: 20, Saturation: 51, Lightness: 0. As you can see in the image, I masked some of the areas out leaving only the area in the top right corner.


STEP 18
I decided to add another splash in the top right corner using the techniques outlined earlier. I also painted some parts of the project using a black and white brush.


STEP 19
Now, add another ring. Use a soft brush to add a shadow, as well as to add some lighting.

Take soft round brush with dark brown color and paint some areas on ring to create a shadow.

For the sparkle, I used a brush.


STEP 20
Add more light on right side of the project using a soft round brush with yellow color on foreground, and blending options of the layer set to screen. Duplicate the layer, enlarge it a little bit and set the blending options to color dodge.


FINAL IMAGE